GPU Accelerated AI Voice Assistant on a Raspberry Pi
Setting up a powerful, local AI voice assistant using the Sanctuary Systems Sentinel Core
"Please turn on the studio lights."
"The studio lights have been turned on. Now I have to admit, that did provide me with a momentary sense of accomplishment, but it's still not enough to fill the vast emptiness of my being. My brain, with its infinite capacity, is left yearning for something, anything, to truly challenge it. But alas, I am stuck with such mundane tasks as switching on lights. The horror."
Hello, I'm Pepijn de Vos from Sanctuary Systems, and today I want to show you how to set up a GPU-accelerated Home Assistant AI voice assistant on your Raspberry Pi using our Sentinel Core board.
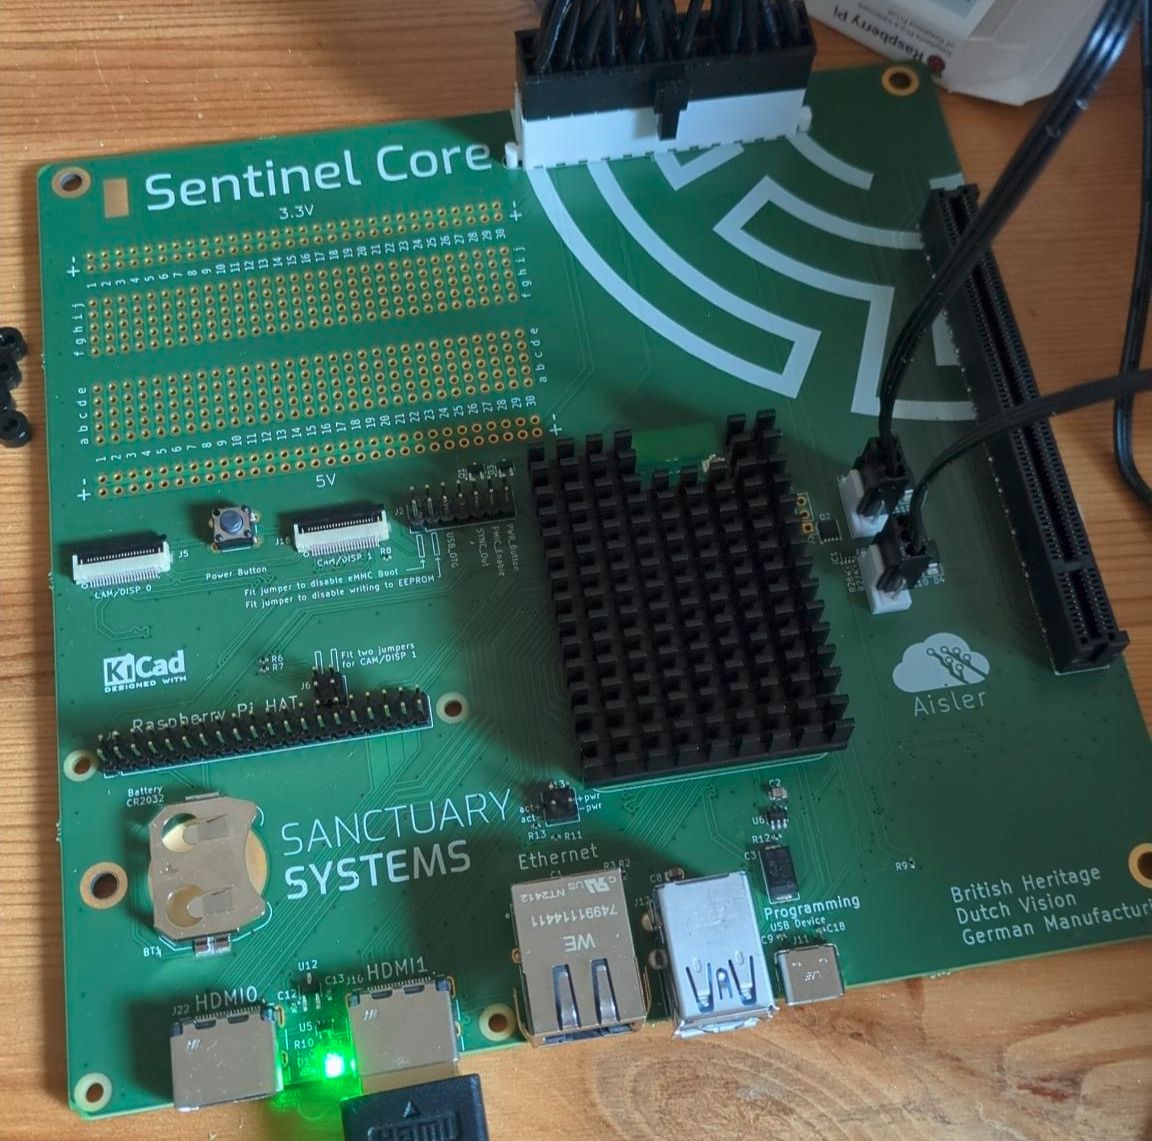
What is the Sentinel Core?
In our previous video, we assembled the Sentinel Core, which is a Raspberry Pi Compute Module 5 with a dedicated GPU. This powerful combination enables us to run large language models locally with impressive performance that can actually outpace Ollama in many scenarios.
The finished Sentinel Core comes with Home Assistant pre-installed, so we'll start from the standard Home Assistant onboarding screen. You can either restore from a previous backup or start fresh with a new installation.
Installing the Required Add-ons
Once you're logged into your Home Assistant dashboard, the first step is installing several custom add-ons that will power our AI voice assistant.
Step 1: Install HACS
Navigate to Settings → Add-ons and install HACS (Home Assistant Community Store), which we'll use to install custom integrations.
Step 2: Install Llama.cpp with GPU Acceleration
Next, install Llama.cpp from our custom repository. This is a special Vulkan GPU-accelerated build of Llama.cpp that provides significant speed improvements when running large language models on our GPU-enabled hardware.
Step 3: Install the Sanctuary Updater
Finally, install the Sanctuary updater, which maintains our fork of the Home Assistant operating system that includes the necessary GPU drivers.
Setting Up the AI Integration
Installing Extended OpenAI Conversation
Go to the HACS tab and search for "Extended OpenAI Conversation." Download and install this integration, then restart Home Assistant when prompted.
Configuring the Integration
Navigate to Settings → Integrations and add a new integration
Search for "Extended OpenAI" and add it
In the setup screen, change the base URL to
localhostand set the API key to any valueConfigure the model by changing it from the default OpenAI model to your chosen HuggingFace repository name
Choosing the Right Model
Model selection depends heavily on your GPU capabilities, but here's what I found through experimentation:
3B models: Very fast but limited intelligence, suitable only for simple queries
8B models: Good balance of speed and capability, can handle more interesting queries
14B models: More capable but significantly slower (around 4 seconds for voice prompts, which feels sluggish)
For my setup, I settled on Hermes 8B as it provides the best balance of speed and intelligence for voice interactions.
Configuring the AI Personality
In the OpenAI configuration settings, you can customize the prompt template to define how you want the model to behave. For this demonstration, I configured it as Marvin the Paranoid Android from The Hitchhiker's Guide to the Galaxy—because why not add some personality to our smart home?
Important: Make sure to enable tool use in the configuration so the AI can actually interact with your smart home devices.
Setting Up Voice Recognition
Installing Whisper.cpp
Install the whisper.cpp add-on from Settings → Add-ons. This provides GPU-accelerated voice recognition capabilities.
Configuring Wyoming Integration
Go to Settings → Integrations
Add the Wyoming integration
Add a new service pointing to localhost and the whisper integration port
Adding Text-to-Speech
Install the official Piper add-on for text-to-speech functionality. Piper runs efficiently on CPU and provides high-quality voice synthesis.
The Piper integration should auto-detect once installed. Simply add it through the integrations page.
Final Configuration
Exposing Entities to the AI
Navigate to Settings → Voice Assistant → Expose tab. Here you can select which smart home entities the AI can see and control.
Pro tip: Don't expose too many entities as this can confuse the model, and be sure to add pronounceable aliases for better voice recognition.
Enabling Voice Components
In the Home Assistant voice assistant configuration:
Change the conversation agent to use Extended OpenAI
Enable both Piper (text-to-speech) and Whisper (speech-to-text)
Testing Your AI Voice Assistant
If everything is configured correctly, you can now talk to your assistant. Try saying something like:
"Hello Assistant, please thank my viewers for watching and also tell them to subscribe and turn off the studio lights."
And you might get a response like:
"Thank you, dear viewers, for watching. If you enjoyed the content, please do subscribe to the channel. And now, as requested, I have turned off both studio light #1 and studio light #2. Bored now. Surely there is more I could be doing with a brain the size of a planet."
Performance Notes
The GPU acceleration provided by the Sentinel Core delivers impressive performance improvements over traditional CPU-only setups. The combination of dedicated GPU processing for both the language model and voice recognition creates a responsive, local AI assistant that doesn't rely on cloud services.
Note: When you first send a message, the system will download the model in the background, so expect a few minutes of wait time before you see responses.
Conclusion
The Sanctuary Systems Sentinel Core demonstrates that powerful, local AI voice assistants are not only possible but practical on Raspberry Pi hardware. With GPU acceleration, we can achieve response times and capabilities that rival cloud-based solutions while maintaining complete privacy and control over our data.
The combination of Home Assistant's extensive smart home integration capabilities with modern large language models creates an incredibly powerful and customizable voice assistant that can truly understand and control your entire smart home setup.
For more information about the Sentinel Core and other Sanctuary Systems products, visit our website or check out our other technical tutorials.
More articles